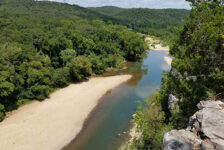

The hike to Iris Falls is one that should be on every Arkansas waterfall hunters list. It is one of the many waterfalls you will find in the Lost Corner area, northwest of Morrilton. In fact, it is only about a quarter of a mile down the road from the parking area to Lizard Log Falls. If you have the Tim Ernst waterfall book, he describes this as a 7-mile hike. But that is if you want to see all of the waterfalls along Brock Creek Trail 23. If you want to see each one individually, there certainly are ways to do that.
I have previously written articles on Schoolhouse Falls and Lizard Log Falls along Brock Creek Trail 23. I still have Voices Falls and Whiskey Chute Falls left to do in this group. As for the hike to Iris Falls, here is the approach I believe most people will want to take. I had the pleasure of joining up once again with Gez Rogers and Super Leeds of Waterfalls in AR for this one. After our Lizard Log Falls hike that morning, they would once again lead the way to show me this route. And I’ll share that route with you here. But first, you’ll want to save these waypoints and GPS track below, and then get yourself to the starting point.
Quick Glance
Distance: Varies by Approach. Our hike is was approximately a 1.4 mile loop
Difficulty: Moderate Bushwhack
Parking Coordinates: 35.54136, -92.81064
1 – Cross The Creek: 35.54097, -92.81179
2 – Creekside Waypoint 1: 35.54082, -92.81254
2 – Creekside Waypoint 2: 35.54088, -92.81339
4 – Top of Iris Falls: 35.54030, -92.81495
5 – Top of Iris Falls View: 35.54039, -92.81535
6 – Bluffline Break: 35.54048, -92.81544
7 – Cross Adjacent Creek: 35.54085, -92.81570
8 – Unnamed Waterfall: 35.54049, -92.81570
9 – Bottom of Iris Falls: 35.54013, -92.81538
10 – Unnamed Waterfall: 35.54148, -92.81564
11 – Leave the Creek, uphill: 35.54149, -92.81540
12- Bushwhack Waypoint: 35.54126, -92.81414
13 – Turn Right on Trail 23 35.54172, -92.81367
14- Turn Left, Back to Parking 35.54103, -92.81185
(Copy/Paste Coordinates into GPS or Google Maps search bar)
GPS Track: Click Here
Directions
From Hector, head north on Hwy 27 to Dare Creek. Immediately after crossing Dare Creek, turn right on White Oak Mountain Rd (Nfm 1301/Co Rd 1). Continue for about 12 miles and turn right onto Wilderness Trail (Co Rd 2). At about 2.4 miles, you’ll reach the parking coordinates listed above. There is not parking area off the road. Just park on the side of the road here. There are other routes to reach this area. If coming from the south or east, use the map below to find the best route.
From this parking area, head straight into the woods on the west side of Wilderness Trail Rd. See the video below for visuals on that part. Head to waypoint #1 that is listed above. This is the point where Brock Creek Trail 23 meets the creek that feeds Iris Falls. After that, it’s a matter of bushwhacking to all the waypoints listed above in that order.
What to Expect
First off, you’re in for a little surprise if you go during wet season. Do that and you can expect to see more than just Iris Falls. More on that later. Much like Lizard Log Falls, the Hike to Iris Falls can be done multiple ways. The route I will describe will first take you to the top of Iris Falls. Then into an adjacent hollow and up the creek to the bottom of the falls. And finally, back up the adjacent creek to see many unnamed falls on the way back. Part of the hike to Iris Falls is on Brock Creek Trail 23, but the rest of the hike is bushwhacking. If you’re new to bushwhack hikes, don’t let that scare you. In the Winter, this is a very clean and easy-to-walk bushwhack with very little undergrowth.
The Hike
The route we took for our hike to Iris Falls was a 1.4 mile loop on the GAIA GPS app. Starting at waypoint #1, follow along that creek to the other waypoints until reaching the top of Iris Falls. From there, go around the right side of the falls for another view, and to find the bluffline break to the bottom. The bluffline break (waypoint #6) will take you down a hill to an adjacent creek. Take a left at that creek, and follow it down and then around the bend to the bottom of Iris Falls. The video below features all of these turns and waypoints.
When it’s time to leave Iris Falls, head back out the same way you came in. Go back to that adjacent creek and hike up it. Bushwhack your way well past the point you dropped in from the bluffline break. At waypoint #11, leave the creek and head back up the hill. Pass by waypoint #12, and then at point #13, turn right on Brock Creek Trail 23. This will lead all the way to waypoint #14, where you’ll turn left and head up the hill to the parking area. We did the hike in about 2 hours, which included time spent at the falls.


Iris Falls
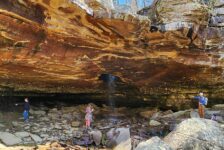
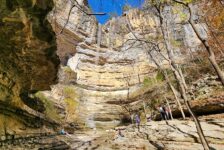
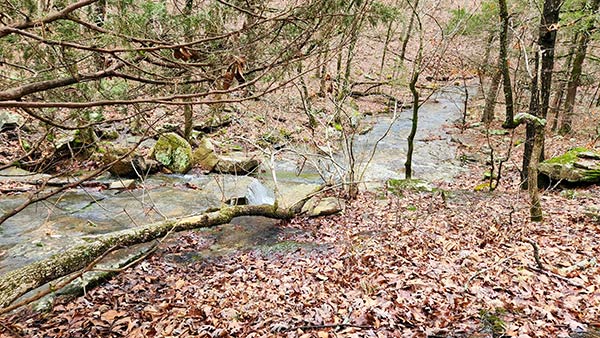
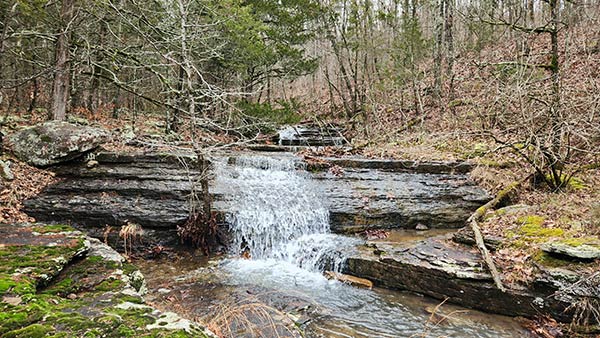
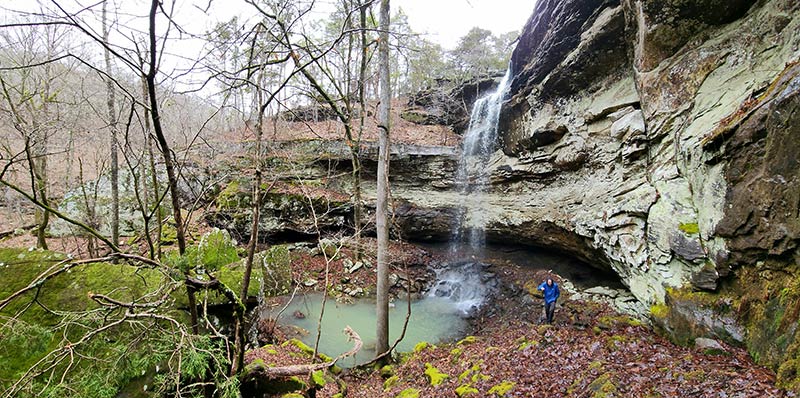
When approaching Iris Falls from the top, you’ll follow along a beautiful creek with several small cascading falls. That creek will hit a larger cascade and several stair steps before finally dropping over the edge. Because you can’t see the entire waterfall from the top, it adds a bit of anticipation for getting to the bottom. Then as you stand above the bluffline break, you get a great birds-eye view of the adjacent creek you’re about to hike to reach the bottom. You can certainly hike this route in reverse and see Iris Falls from the bottom first. But I don’t think the “wow” factor would be as great that way.
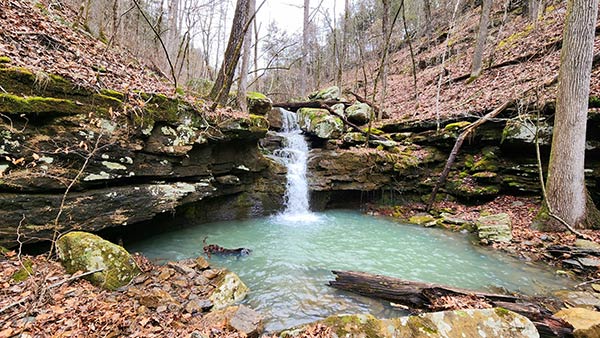
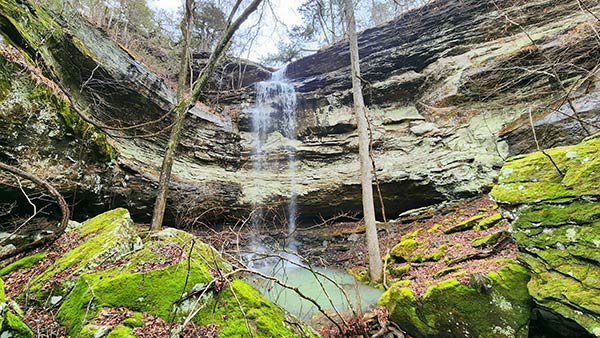
It’s not until you reach the bottom that you get to see the rest of the 64-ft Iris Falls. This was my favorite view for sure, and just another reason to save the best for last. Iris Falls was bigger and more impressive than I expected. (I should note that we went a day or two after the area had gotten some snow and rain). It is located in a U-shaped hollow with stone bluff walls that rise straight up. As the water falls off the top, it drops straight down past a massive cliff and grotto before landing in the pool below. There are so many great angles and vantage points at the bottom that it makes it kind of hard to leave!
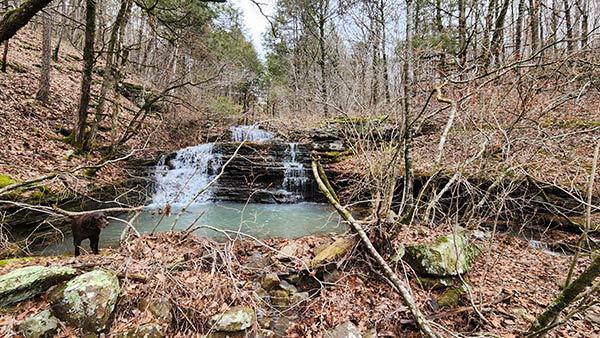
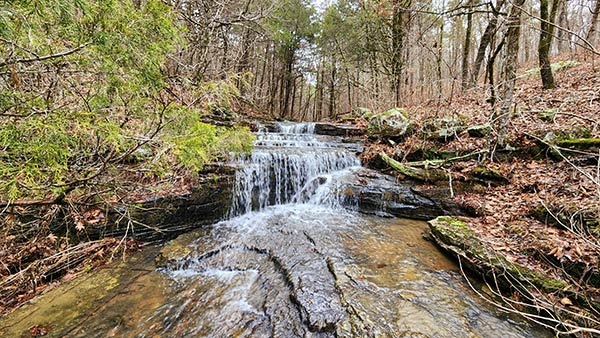
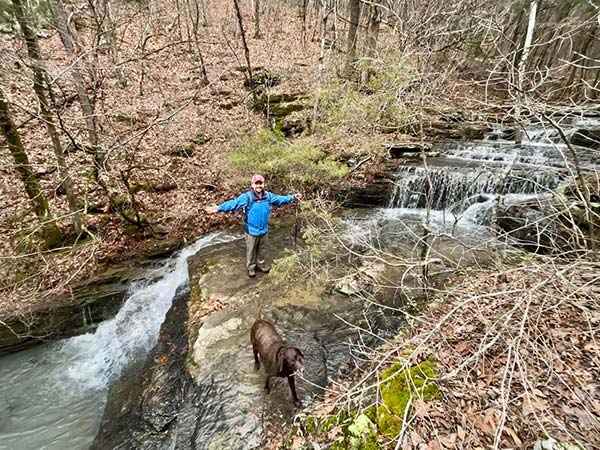
Surprise Features
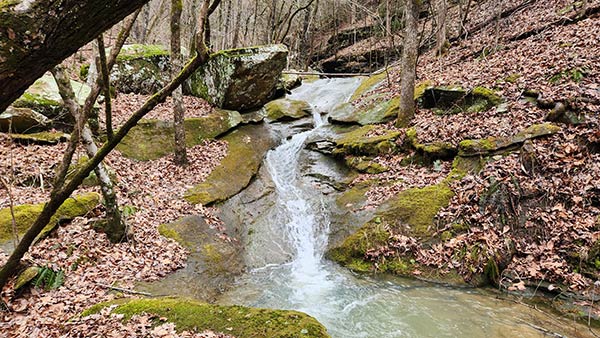
So what’s the surprise I mentioned earlier? It’s the adjacent creek you hike down to reach the bottom of Iris Falls. When you first see it from high atop the bluffline break, you’ll spot a few waterfalls right off the bat. On the return hike up the creek, you’ll pass by several unnamed falls. One after another, these falls cascade and stair-step down as the creek winds it’s way down the hill. I can’t promise it will be so spectacular outside of rainy season, but on this day it was pretty fantastic. This route is very picturesque as you can see in the video below. It is also easier than hiking back up the hill we originally came down to reach the creek. Although I’ve ruined the surprise for you, I was pleasantly surprised by this bonus section to our hike.
Plan Your Trip
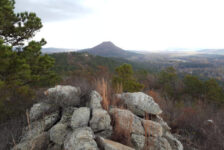
The Brock Creek/Lost Corner area is fairly remote. Plan on driving 15+ miles on dirt roads to get to most of the waterfall hikes in this area. These are pretty good dirt roads though. Four Wheel Drive is not necessary. Also don’t plan on having cell service. You might catch a weak signal here and there, but not likely. That means save all maps, waypoints, and GPS tracks before going. And I recommend using a GPS for all hikes in this area. The main trails here are clear and pretty well-marked. But most waterfall hikes here involve getting off the main trail. And many of them will be over some pretty rugged terrain. I wouldn’t do any of these hikes in anything less than sturdy hiking boots. No tennis shoes or sandals. Also, I recommend using a trekking pole because you’ll be going up and down steep rocky hills, and rock-hopping through creeks.
Since it does take a while to get out there, I recommend planning multiple hikes in the area and making a day of it. To see all the waterfalls in the area, check out the Waterfalls in Arkansas map. Click on each one to find links with information. Also, click here to see all the hikes in the Lost Corner that we have on the blog so far. Because most hikes in this area require some bushwhacking, I don’t hike the area too late into Spring. Once it’s fully green, the vegetation can get pretty thick. So if you go in late Spring, use plenty of bug spray. Most hikes in this area are pretty far from anything. So take food and water with you. Just be sure to pack out what you pack in and leave no trace. Take only pictures and leave only your footprints. Enjoy the hike!